Email Campaigns
Admin Data Access roles required (Organisation, Global Manager, Country Manager, Branch Manager)
The Email Campaigns page is your hub for sending targeted bulk emails to leads and clients. From a single page you can:
- View, search, and manage all bulk email campaigns
- Track campaign status and recipient counts at a glance
- Create new campaigns and assign them an email template
- Open any campaign to monitor delivery statistics, email logs, and status history
- Navigate to the Email Template manager to build and maintain reusable email templates
- Create new email templates using a full visual drag-and-drop editor
Step 1 — Bulk Email Campaigns List

When you open Email Campaigns from the sidebar, you land on the Bulk Email Campaigns list. This table shows all campaigns with the following columns:
| Column | Description |
|---|---|
| Campaign Name | Internal name — click to open the campaign detail view |
| Description | Short description of the campaign's purpose |
| Template | The email template linked to this campaign |
| Status | Current campaign status (see below) |
| Recipients | Number of recipients targeted |
| Created | Date the campaign was created |
| Last Updated | Date and time of the most recent change |
Summary badges at the top show live counts for Total, Scheduled, In Progress, and Completed campaigns.
Campaign Statuses
| Status | Meaning |
|---|---|
| Draft | Created but not yet sent or scheduled |
| Scheduled | Queued for a future send |
| In Progress | Currently sending emails |
| Completed | All emails dispatched |
| Paused | Sending temporarily paused |
| Cancelled | Campaign has been abandoned |
Step 2 — Email Templates (via "Manage Email Templates")
In the top right of the campaign list, click the Manage Email Templates button.
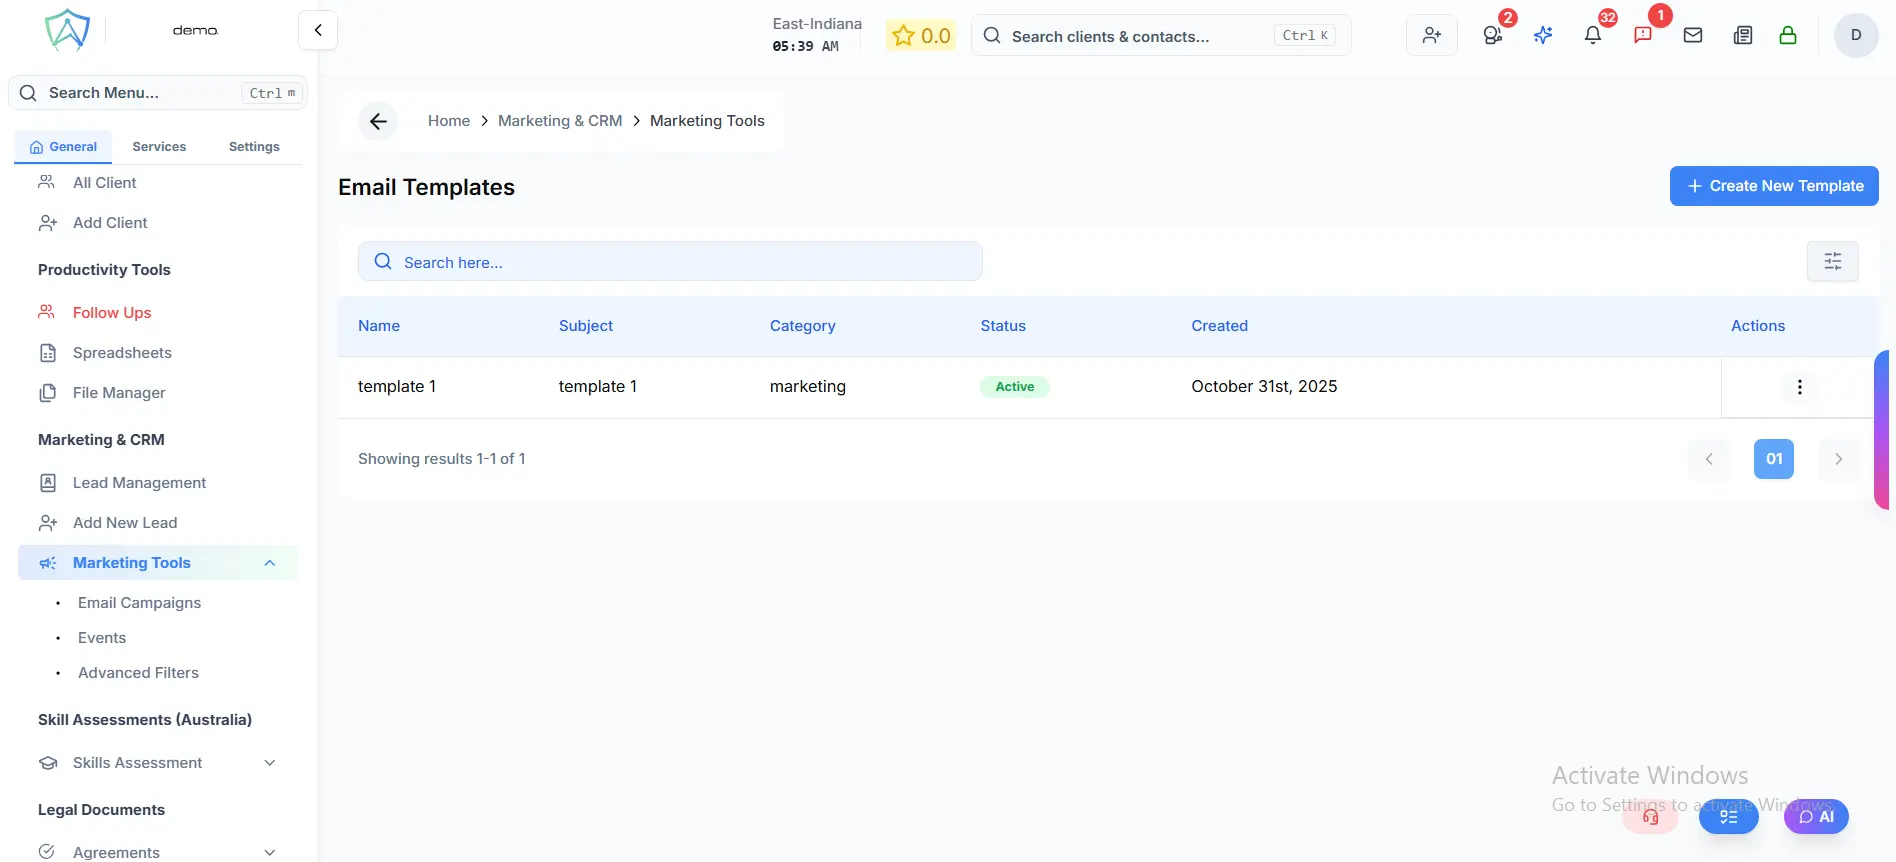
This opens the Email Templates page, which lists all marketing email templates:
| Column | Description |
|---|---|
| Name | Template name |
| Subject | The email subject line shown to recipients |
| Category | Template category (campaigns use marketing) |
| Status | Active (green) or Inactive (red) |
| Created | Date the template was created |
From here you can search, view, edit, and delete existing templates.
Step 3 — Create a New Email Template
On the Email Templates page, click Create New Template (top right).
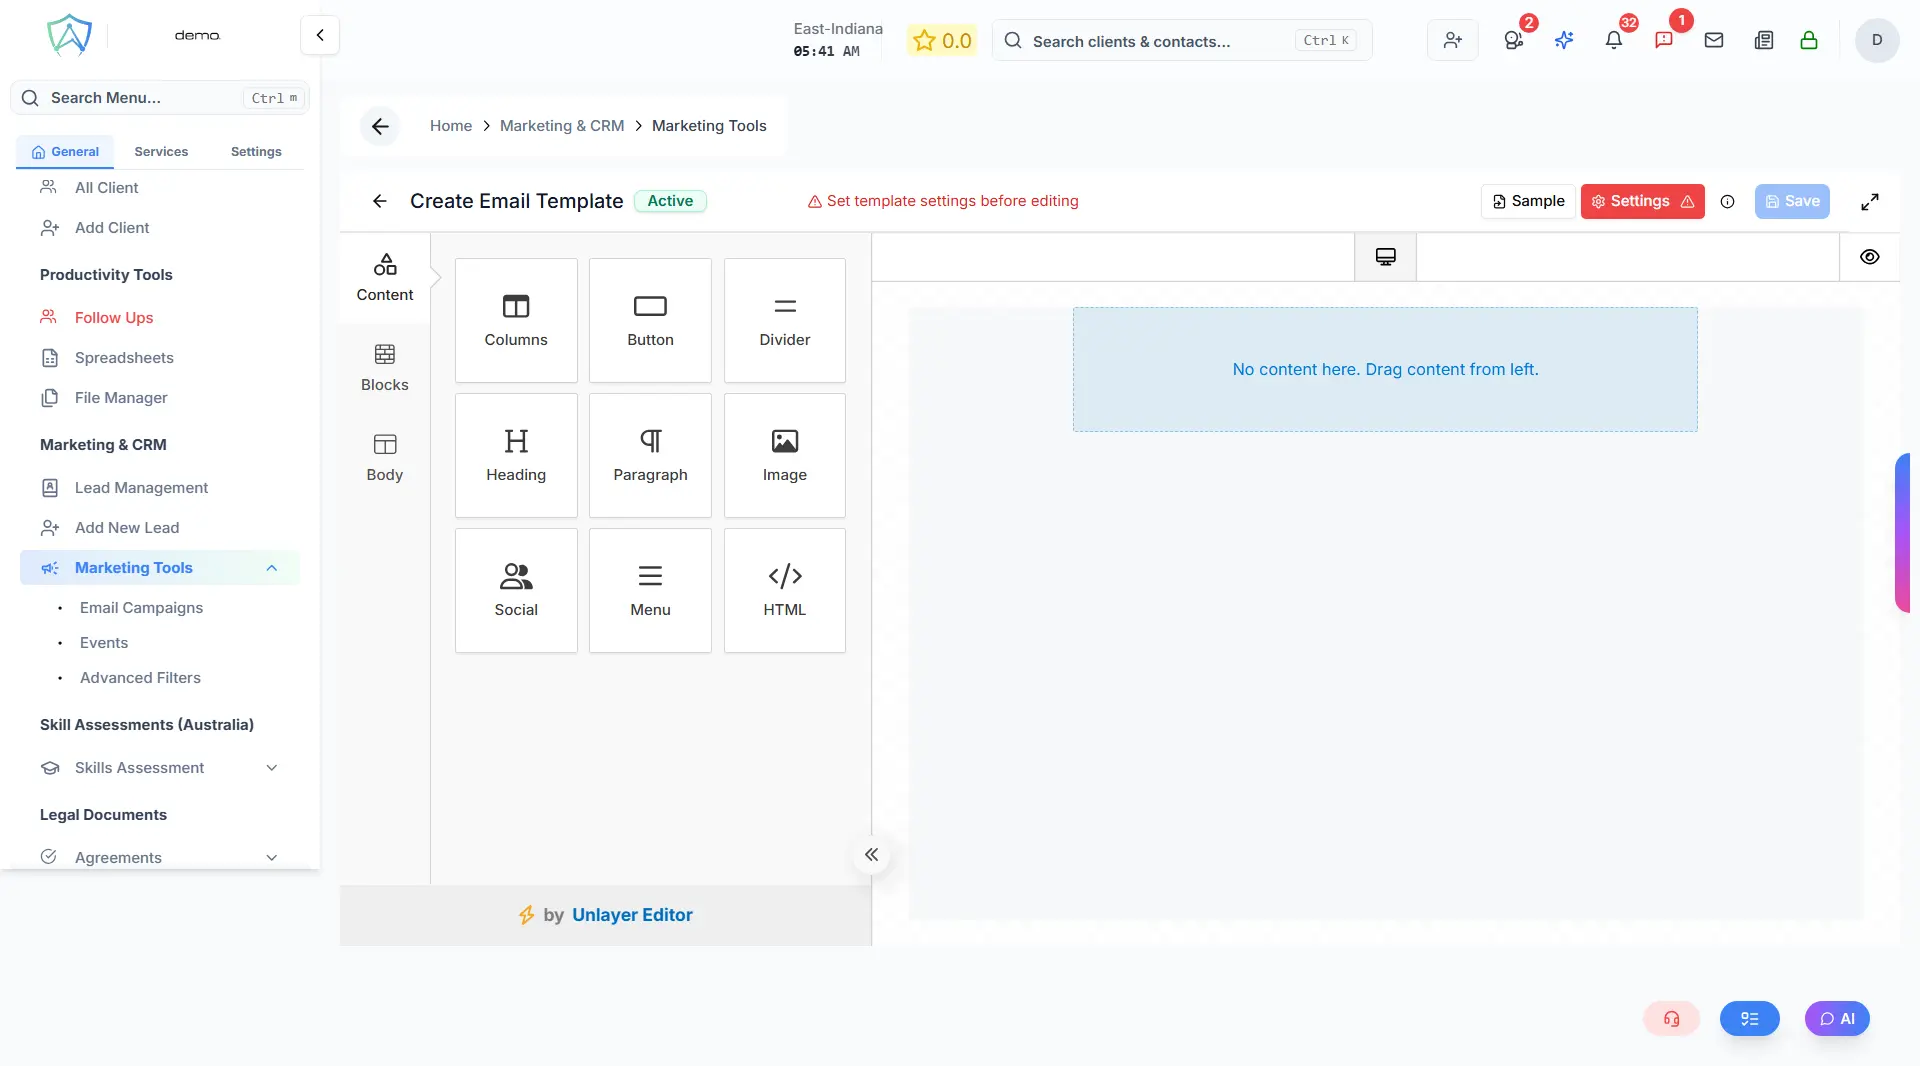
This opens the Email Template Editor — a full visual drag-and-drop email builder. From here:
-
Click the Settings icon to configure the template:
- Name (required) — internal reference
- Subject (required) — email subject line shown to recipients
- Description — optional internal notes
- Active — only active templates are available to use in campaigns
-
Build the email body using the drag-and-drop editor — add sections, images, text blocks, buttons, and dividers
-
Click Save to save the template. You will remain on the editor so you can continue editing.
The editor auto-saves your work every 30 seconds. A full-screen mode is available for a larger editing area.
Step 4 — Create a Campaign
Once you have at least one email template, go back to the campaign list and click Create Campaign.
| Field | Required | Notes |
|---|---|---|
| Email Template | ✅ Yes | Select from your marketing templates. Cannot be changed after creation. |
| Campaign Name | ✅ Yes | Internal reference name |
| Description | ✅ Yes | Brief description of the campaign |
Click Create Campaign — the campaign is saved as Draft and you are returned to the campaign list.
Managing an Existing Campaign
Click any campaign name to open its detail view.
The detail view shows campaign information (template, recipient count, progress, dates) and three tabs:
| Tab | Contents |
|---|---|
| Overview | Delivery statistics — Sent, Delivered, Opened, Clicked, Failed |
| Email Logs | Per-recipient log of individual delivery status |
| Timeline | History of all status changes |
Available actions depend on current status:
| Current Status | Available Actions |
|---|---|
| Draft | Schedule · Start Now |
| Scheduled | Start Now · Cancel |
| In Progress | Mark as Complete |
| Completed / Cancelled | No further actions |
Start Now begins sending emails immediately. A confirmation dialog will appear before the action is applied.